



Thinking about launching your own website but feeling overwhelmed by all the steps? You’re not alone.
One of the first and most important decisions you’ll make is choosing the right hosting and domain for your site. If you’ve heard about GoDaddy but aren’t sure how to buy hosting or secure your perfect domain name there, this guide is made just for you.
By the time you finish reading, you’ll know exactly how to get started with GoDaddy hosting and register your domain easily, without any confusion. Ready to take control of your online presence? Let’s dive in and make your website dreams a reality.
Credit: www.godaddy.com
Godaddy Hosting Plans
Choosing the right GoDaddy hosting plan is essential for your website’s success. Whether you’re launching a personal blog or running a business site, GoDaddy offers a variety of hosting options tailored to different needs and skill levels. Understanding these plans helps you pick the one that fits your goals and budget perfectly.
Shared Hosting Options
Shared hosting is the most affordable and beginner-friendly plan GoDaddy offers. Your website shares server resources with other sites, which keeps costs low. This option is ideal if you’re just starting out or have a small site with moderate traffic.
GoDaddy’s shared hosting plans come with easy-to-use control panels and one-click installs for popular apps like WordPress. You also get 24/7 customer support to help you through any technical issues. Have you thought about how much traffic you expect? This can help you decide if shared hosting will meet your needs.
Vps And Dedicated Servers
If your website grows and needs more power, GoDaddy offers VPS (Virtual Private Server) and dedicated server plans. VPS gives you a private slice of a server, offering more control and better performance than shared hosting. Dedicated servers provide an entire physical server just for your site, perfect for high-traffic or resource-heavy websites.
These plans require more technical knowledge but deliver superior speed, security, and customization. You can install custom software and manage server settings to optimize performance. Ask yourself if you need full control over your server or if managed hosting services suit you better.
WordPress Hosting Features
GoDaddy’s WordPress hosting is designed specifically for WordPress sites, combining ease of use with optimized performance. It includes automatic updates, daily backups, and built-in security features that keep your site safe without extra effort.
The setup is fast, and you don’t need to worry about technical maintenance. Plus, GoDaddy provides expert support that understands WordPress inside out. Do you want a hassle-free experience where you focus on content instead of technical details? This plan might be the right choice.
Choosing The Right Plan
Choosing the right hosting plan on GoDaddy is essential for your website’s success. It affects your site’s speed, security, and growth potential. This section helps you pick the best plan based on your needs. Simple steps make the process clear and manageable.
Assessing Your Website Needs
Start by thinking about your website type. Is it a blog, an online store, or a business site? Different sites need different resources. Consider how many visitors you expect daily. Also, think about the space you need for files and images. Check if your site will use special software or apps. This helps narrow down the right hosting type and features.
Comparing Pricing And Features
Look at the price of each GoDaddy hosting plan. Lower prices suit small sites or beginners. Higher plans offer more storage, bandwidth, and tools. Check features like SSL certificates, backups, and customer support. Some plans include free domain registration for a year. Compare what each plan offers against your website needs. Choose a plan that balances cost with the features you need.
Selecting Hosting Duration
Decide how long you want to pay upfront. GoDaddy offers monthly, yearly, or multi-year plans. Longer terms usually save money over time. Think about your budget and commitment to your site. Shorter plans give flexibility if you want to change later. Longer plans provide stability and often come with discounts. Pick a duration that fits your plans and finances.
Domain Registration With Hosting
Registering your domain along with hosting simplifies the website setup process. It saves time and keeps your services in one place. GoDaddy offers easy options to bundle domain registration and hosting. This helps beginners manage their online presence more efficiently.
Benefits Of Bundling Domain And Hosting
Bundling your domain and hosting provides several advantages. You get one account to manage both services. This makes billing and support easier. Also, GoDaddy often offers discounts when you buy both together. Your domain connects automatically to your hosting. This reduces technical steps and speeds up setup.
Searching For Domain Names
Choosing the right domain name is important. It should be short, simple, and easy to remember. Use keywords that relate to your website topic. Check if the name is available on GoDaddy’s search tool. Try different combinations if your first choice is taken. Avoid names with hyphens or numbers to keep it clear.
Using Godaddy’s Domain Suggestions
GoDaddy offers domain suggestions if your preferred name is not available. These ideas use similar words or different extensions like .net or .org. Suggestions help you find a good alternative quickly. Review the list carefully to pick a name that fits your brand. This tool makes the domain search process faster and less stressful.

Credit: www.youtube.com
Creating Your Godaddy Account
Creating your GoDaddy account is the first step toward buying hosting and a domain. The process is simple and quick. This guide helps you set up your account smoothly. Follow these steps to get started confidently.
Step-by-step Account Setup
Visit the GoDaddy website and click “Sign Up.” Enter your email address and create a strong password. Choose a username that is easy to remember. Fill in your personal details, including your name and phone number. Verify your email by clicking the link sent to your inbox. Your account is now ready to use.
Managing Billing Information
Log in to your GoDaddy account and go to the “Billing & Payments” section. Add your billing address accurately to avoid any issues. Review your billing history to keep track of your expenses. Update your contact information if it changes. This ensures smooth billing and service continuity.
Setting Up Payment Methods
Access the payment settings from your account dashboard. Add your preferred payment option, such as credit card or PayPal. Enter the payment details carefully to prevent errors. Save your payment method for faster checkout. You can update or remove payment methods anytime.
Configuring Your Hosting
After purchasing hosting on GoDaddy, the next step is to set up your hosting environment. Configuring your hosting ensures your website runs smoothly and your domain connects properly. This process involves accessing the hosting dashboard, linking your domain, and setting up email accounts. Each step is simple and helps you control your online presence effectively.
Accessing The Hosting Dashboard
Log in to your GoDaddy account. Go to the “My Products” section. Find your hosting plan and click “Manage.”
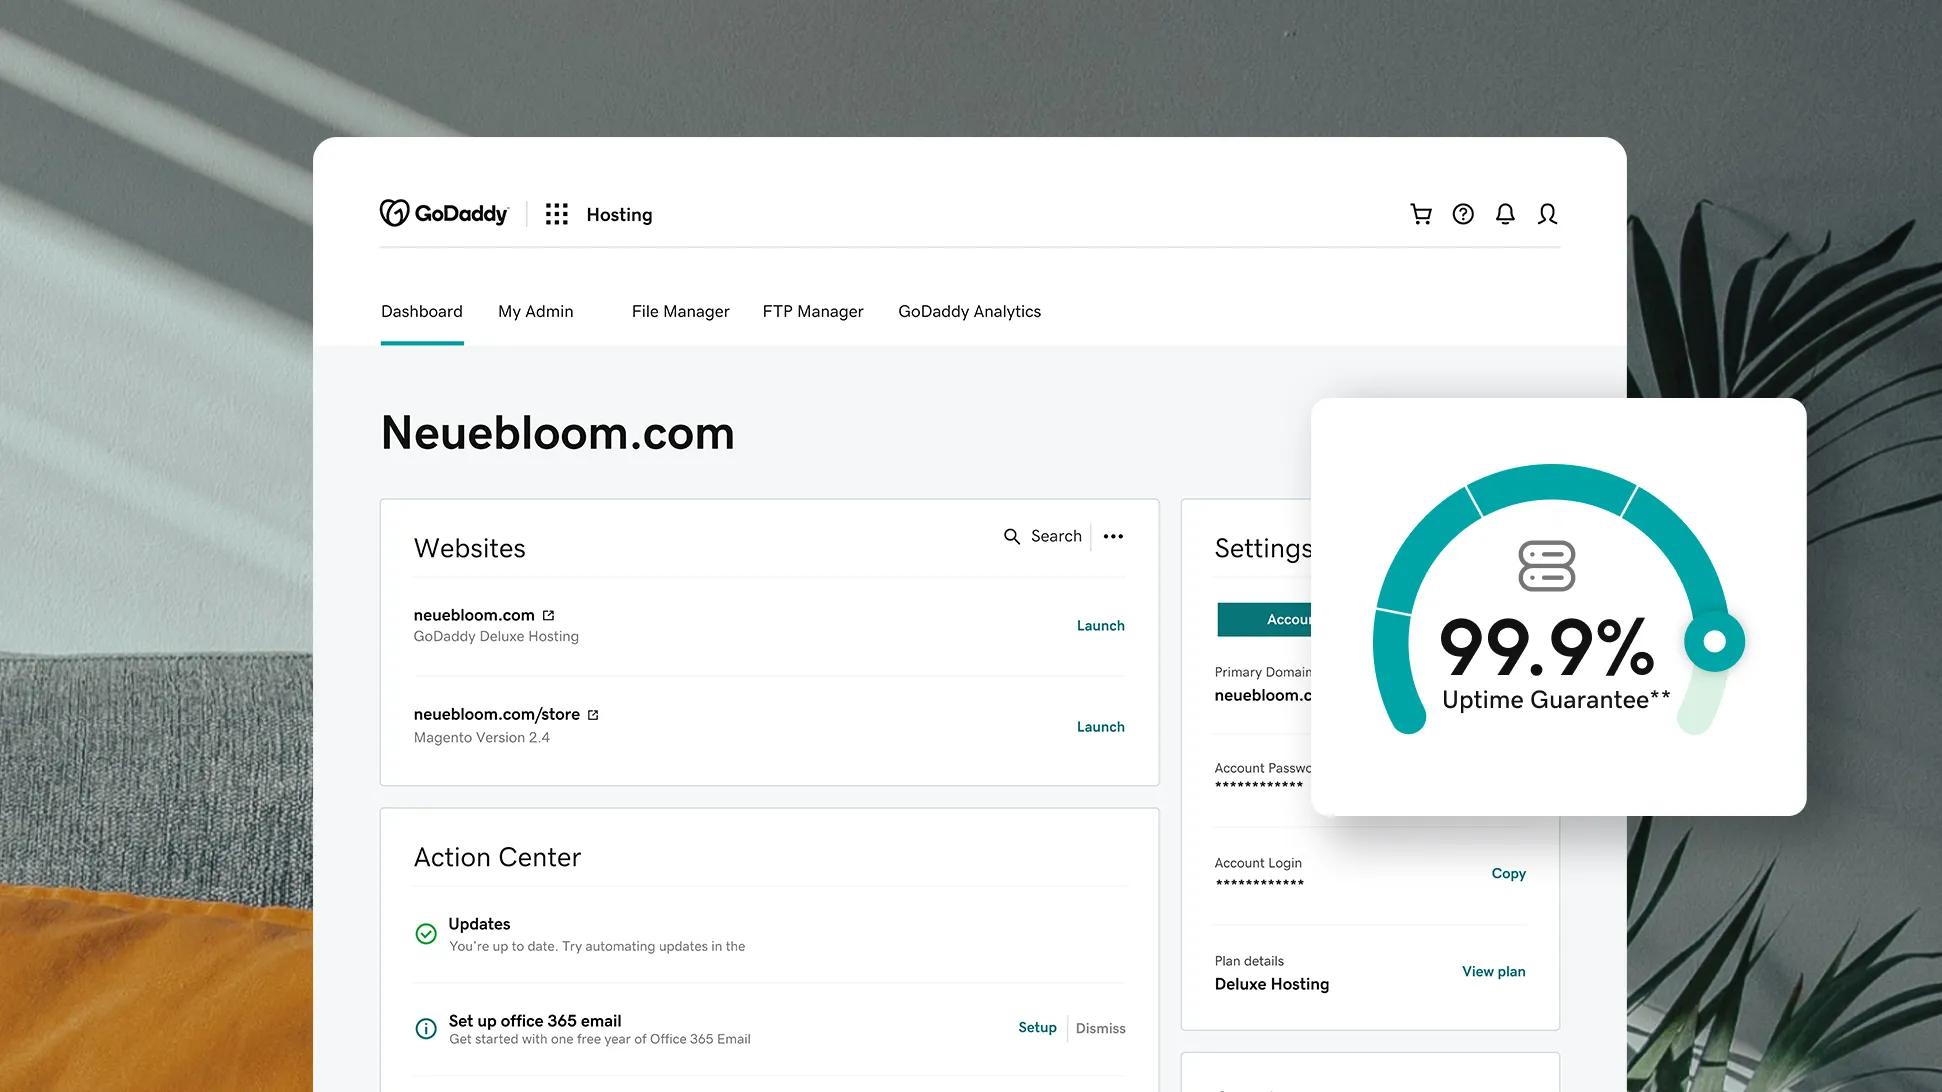
The hosting dashboard shows your server details, files, and settings. Use it to control your website and hosting features. The interface is user-friendly, so you can navigate easily. Check for updates or tools offered by GoDaddy to optimize your site.
Linking Domain To Hosting
To connect your domain, go to the “Domains” section in your account. Choose the domain you want to link. Update the DNS settings to point to your hosting server.
Change the nameservers to GoDaddy’s hosting nameservers. This step connects your domain with your hosting account. It may take a few hours for DNS changes to work worldwide. Once linked, your domain will show your website content hosted on GoDaddy.
Setting Up Email Accounts
Email accounts give your website a professional touch. In your hosting dashboard, find the “Email” or “Workspace Email” section. Create new email addresses using your domain name.
Set passwords and mailbox sizes for each account. You can access these emails through webmail or link them to email clients like Outlook. Managing emails on GoDaddy is simple and helps you communicate with visitors or customers easily.
Installing Website Platforms
After purchasing your hosting and domain from GoDaddy, the next step is setting up your website platform. This process allows you to build and manage your website content easily. GoDaddy offers several ways to install website platforms. Choose the one that fits your skill level and website needs.
One-click WordPress Installation
GoDaddy makes WordPress setup simple with one-click installation. This feature installs WordPress automatically on your hosting account. Just log in to your GoDaddy dashboard, find the WordPress option, and click install. The system handles the technical steps. You can start customizing your website in minutes. This method suits beginners who want a quick start.
Manual Cms Setup
Manual setup is for users who want more control over their website. You download the CMS files, such as WordPress, Joomla, or Drupal, from the official site. Then, upload these files to your GoDaddy hosting via FTP or the file manager. Next, create a database in your hosting panel and link it to the CMS. Finally, run the installation script to complete the setup. This method requires basic technical knowledge but offers flexibility.
Using Godaddy Website Builder
GoDaddy also offers a Website Builder tool for easy site creation. It includes drag-and-drop features and pre-built templates. No coding or technical skills are needed. You can add text, images, and contact forms quickly. This builder integrates seamlessly with your hosting and domain. It is perfect for small businesses and personal sites. The Website Builder keeps the process simple and efficient.
Finalizing Your Purchase
Finalizing your purchase is the last step in securing your hosting and domain on GoDaddy. This stage ensures all your details are correct. It also lets you apply discounts and complete payment safely. Take your time to avoid mistakes. A smooth checkout means your website goes live faster.
Reviewing Order Details
Check every item in your cart carefully. Verify the hosting plan, domain name, and billing cycle. Confirm the plan matches your needs. Look for any extras you may have added, like security or backups. Make sure your contact information is accurate. Mistakes here can cause delays later.
Applying Promo Codes
Look for promo codes to reduce the price. Enter the code in the promo box before payment. Promo codes can save you money instantly. Double-check that the discount is applied. Some codes have expiration dates or restrictions. Using a valid code helps keep your budget on track.
Completing Checkout
Choose your payment method carefully. GoDaddy accepts credit cards, PayPal, and other options. Fill in payment details accurately. Review the total amount one last time. Agree to the terms of service. Click the purchase or complete order button. After payment, you will get a confirmation email. Save this email for your records.
Credit: www.schulzecreativellc.com
Post-purchase Tips
After buying hosting and your domain from GoDaddy, some steps help keep your website running smoothly. These post-purchase tips guide you through support access, managing renewals, and improving site speed. They ensure your online presence stays reliable and easy to handle.
Accessing Customer Support
GoDaddy offers customer support 24/7 by phone and live chat. Save their contact info for quick help. Use the support portal to find guides and answers. Clear questions get faster responses. Keep your account details ready when contacting support.
Managing Renewals And Upgrades
Track your hosting and domain renewal dates in your GoDaddy dashboard. Set reminders to avoid service interruptions. Consider upgrading your plan if your site grows. Upgrades improve speed, storage, and features. Review renewal costs each year to avoid surprises.
Optimizing Website Performance
Use GoDaddy’s built-in tools to check site speed and uptime. Regularly update your website software and plugins. Compress images to load pages faster. Choose a content delivery network (CDN) for global visitors. Back up your site often to prevent data loss.
How Our Company Can Help You with How to Buy Hosting in Godaddy Beginners Guide With Domain
Practical Learning Opportunities When Buying Hosting with GoDaddy
As you navigate through selecting a hosting plan and registering your domain with GoDaddy, it’s valuable to treat the process as a hands-on learning experience. Starting with choosing the right hosting plan gives you insight into different service levels, helping you understand what suits your website’s needs best. Creating your GoDaddy account and configuring your hosting further deepens your familiarity with web hosting essentials.
Installing website platforms like WordPress after your purchase provides practical exposure to site setup and management. This step-by-step engagement not only builds confidence but also equips you with foundational skills relevant to many hosting environments.
At HostingAdvise, we emphasize evidence-based guidance and honest advice to empower beginners, bloggers, and businesses alike. If you encounter any uncertainties during this process, consider consulting GoDaddy’s official documentation or reaching out to their support team for clarification.
Frequently Asked Questions
How Do I Buy Hosting For My Domain On Godaddy?
Visit GoDaddy’s website, choose a hosting plan, select your domain, and complete the purchase with payment details.
How Do I Add Hosting To My Godaddy Domain?
Log in to your GoDaddy account and go to the Hosting section. Choose a hosting plan and purchase it. Next, link your domain by selecting it during setup or in your hosting settings. Finally, configure DNS to point your domain to the hosting server.
Is Hosting Included In A Godaddy Domain?
No, GoDaddy domain purchases do not include hosting. You must buy hosting separately to host your website.
How To Host A Website In Godaddy Step By Step?
Buy a hosting plan on GoDaddy. Register or connect your domain. Set up your account and billing. Install your website or CMS. Link your domain to hosting. Finally, publish your site and check it online.
Conclusion
Buying hosting and a domain on GoDaddy is simple and fast. Choose the right hosting plan that fits your needs. Pick a domain name that represents your website well. Follow the step-by-step process to complete your purchase. Soon, your site will be ready to go live.
Take your time and review each choice carefully. Starting your website journey with GoDaddy can be smooth and easy. Now, you have the basics to get started confidently.










Leave a comment